
Hamburger Menu.
At the top left of the App there is a Hamburger Menu. 3 vertical dots.
Click the Hamburger menu to open it.
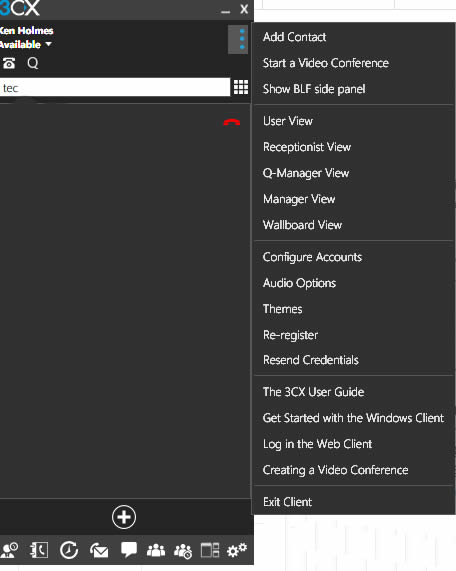 Add a Contact: Select this to add a contact to your contact list. This is your personal contact list only visible to you. If you have rights to add contacts to the Company Contacts List that is visible to everyone, you have an option to choose to add the contact to the Company Contact List.
Start a Video Conference: Will take you to the Web Client to initiate a Video Conference.
Show BLF Side Panel: Select this to show all your BLFs. These are the same BLFs that have buttons on your Desktop Phone. Once selected, the option changes to Hide BLF Panel
User View: This is the default View of just the App.
Receptionist View: A separate view allowing a receptionist to the status of all extensions.
Q-Manager View: Allows a Queue Manager in a Call Center to see all queue activity.
Manager View: A cut down version of the receptionist view for managers.
Wallboard View: This is for a call center and is normally shown on a TV screen mounted on the wall where all users can see it. It shows how many calls are in the queue, how many are currently being answered, the average duration of a call, the number of of hangups and so on. This information is useful to users in a call center.
Configure Accounts: Select the account you want to use if you have more than one.
Audio Options: Setup your microphone and Speakers.
Themes: Change your App theme.
Re-Register: Re-Register your extension if it’s acting squirly.
Resend Credentials: Re-send your Welcome Email.
Help: Below that are some 3CX help files to give you additional information on how to use your phone system.